Set up job numbering
This is the admin playbook for turning on automatic job numbers. You'll open Settings, turn numbering on, build a pattern from tokens, set the starting number, check the live preview, and then see it prefill on the next project you create. It's a one-time setup for your whole organization.
New to projects? See Projects for what a job number is and where it shows up. This playbook assumes job numbering is available for your organization.
Open Settings and turn numbering on
Job numbering lives in the numbering settings for your organization.
- 1
Go to Settings, Numbering
Open Settings and choose the Numbering section. - 2
Turn on job numbers
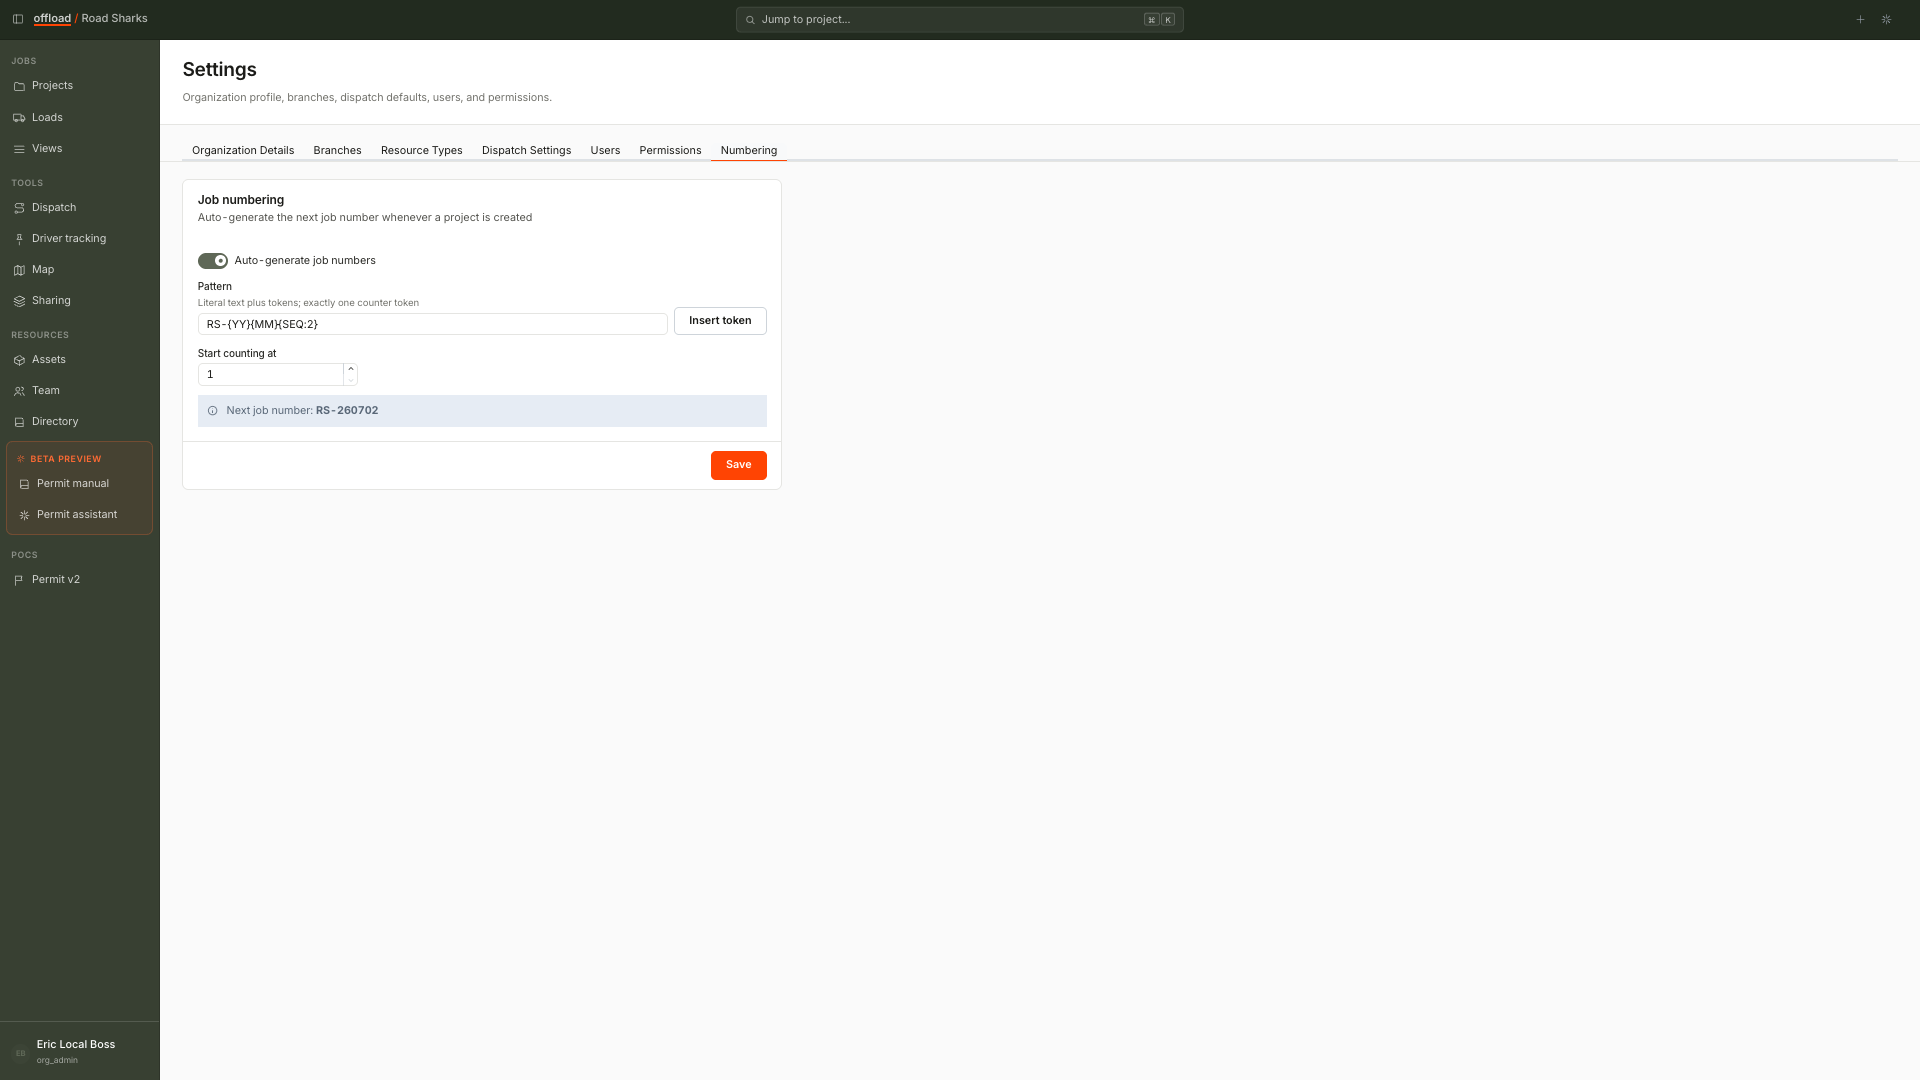
Switch on the toggle in the Job numbers panel. This enables the pattern and start-number fields below it.
Build the pattern
The pattern decides what each job number looks like. It's literal text plus tokens, with exactly one counter token.
- 1
Insert tokens
Use the "Insert token" menu to drop tokens into the pattern, or type them. You can mix in literal text (like a dash or a prefix) between tokens. - 2
Include exactly one counter
Every pattern needs one counter token:{SEQ:4}for a zero-padded counter (0001) or{SEQ}for a plain counter (1). - 3
Add date tokens if you want rollover
Add a year or month token to reset the counter by period (see the tokens below).
The tokens you can use:
{SEQ:4}- zero-padded counter, like 0001.{SEQ}- plain counter, like 1.{YY}- two-digit year, like 26.{YYYY}- four-digit year, like 2026.{MM}- two-digit month, like 07.- Literal text - anything else you type, like a dash or a branch prefix.
The default pattern is {YY}-{SEQ:4}, which produces numbers like 26-0001. The pattern validates as you type, so a bad pattern shows an error right away.
The counter resets based on the date tokens in your pattern. A pattern with a year token (like {YY}-{SEQ:4}) resets the counter each year. A pattern with year and month tokens (like {YY}{MM}-{SEQ:4}) resets it each month. No date token means the counter just keeps climbing.
Set the start number and read the preview
- 1
Set the starting counter
Use "Start counting at" to set where the counter begins. The default is 1. - 2
Read the live preview
A "Next job number" preview shows the actual next number, computed against your organization's real data. Use it to confirm the pattern reads the way you expect. - 3
Save
Save the settings. Numbering is now on for every new project.
See it on a new project
- 1
Create a project
Open the Create Project modal. The next job number shows as a fixed chip in the Project ID / Job number field; the field itself takes an optional suffix. - 2
Accept or extend
Leave the suffix empty to let the server assign the next number in the sequence, or type a suffix to append it to the assigned number (for example, a chip showing 26-1042 plus a typed A saves as 26-1042-A).
The chip is a live preview; the actual number is assigned when the project saves. That's why two people creating projects at the same time never collide on a number: the sequence is settled server-side, not from the preview. To use a fully custom number for a specific job, turn numbering off in Settings, or edit the number after creating.
Number loads and phases too
Loads and sitework phases can auto-number the same way, each with its own toggle and pattern in the same Settings section.
- Load numbers and Site work numbers each get their own panel: a toggle, a pattern, a starting number, and a live example. Load and phase counters are scoped per job, so every job's loads start fresh.
- With numbering off, loads keep their simple sequence (001, 002, ...) and phase numbers are typed by hand, exactly as before.
- Share one counter between loads and phases makes loads and phases under a job draw from a single sequence with their own prefixes, so creation order reads straight off the numbers: S01, L02, L03, S04. With the shared counter, both patterns must use the same date tokens so they roll over together.
- On the create surfaces (the New load drawer and the Add phase modal), the next number shows as a fixed chip with an optional suffix, the same as jobs.
Follow-up jobs
Separate from the numbering pattern, Create follow-up job (from a project's row menu) numbers a separately-billable extension of a job as {parent}-1, {parent}-2, and so on. It's available to every organization, whether or not you've set up numbering.
In v1, automatic job numbering and bulk import can't be active for the same organization at once. If bulk import is on, turning numbering on is refused until you deactivate bulk import first (and the other way around). The two features assign job numbers in ways that would conflict.