Load management
A load is the central thing in Offload: a shipment that needs to move from an origin to a destination. Each load holds its route, permit, commodity, and equipment in one place.
New to loads? The back office creates and configures loads on the desktop (see Creating a load), and drivers find their assigned loads on the phone or tablet (see Finding your loads). Common questions are answered in the Load FAQ.
How it works
A load moves through a few milestones from creation to delivery:
- 1
Create
The back office creates the load inside a project, with its origin and destination, commodity, and equipment requirements. - 2
Plan
The route and permits get attached, and resources (driver, truck, trailer) get assigned, so the load is ready to move. - 3
Dispatch
The load is scheduled on the dispatch calendar and handed to the driver, who follows the approved route. - 4
Deliver
The load reaches its destination and the job is complete.
Creating a load
Loads are created from the back office. There are two ways to start:
- Global add (+) menu - the plus button in the top navigation, available from anywhere in the app. Pick "Load(s)" to open the Add Loads dialog.
- From a project - open a project and add loads directly to it.
Every new load needs:
- A project - each load belongs to a project. You can pick an existing project or create one without leaving the dialog. (A customer is optional on the project, not on the load itself.)
- Origin and destination addresses.
- Commodity details (description, weight, dimensions).
- Equipment requirements (driver, truck, and trailer types).
For the full walkthrough, see Creating a load.
Load statuses
Every load carries a status that you set from the load header or the load details. It shows where the load stands and how it is tracking against its schedule:
- Planning - the load is being set up (route, permits, and resources not finalized).
- Scheduled - the load is set up and booked on the dispatch calendar.
- On-time - the load is tracking to its planned schedule.
- Delayed - the load is running behind its planned schedule.
- Delivered - the load reached its destination and the job is complete.
Who's carrying it (equipment setups)
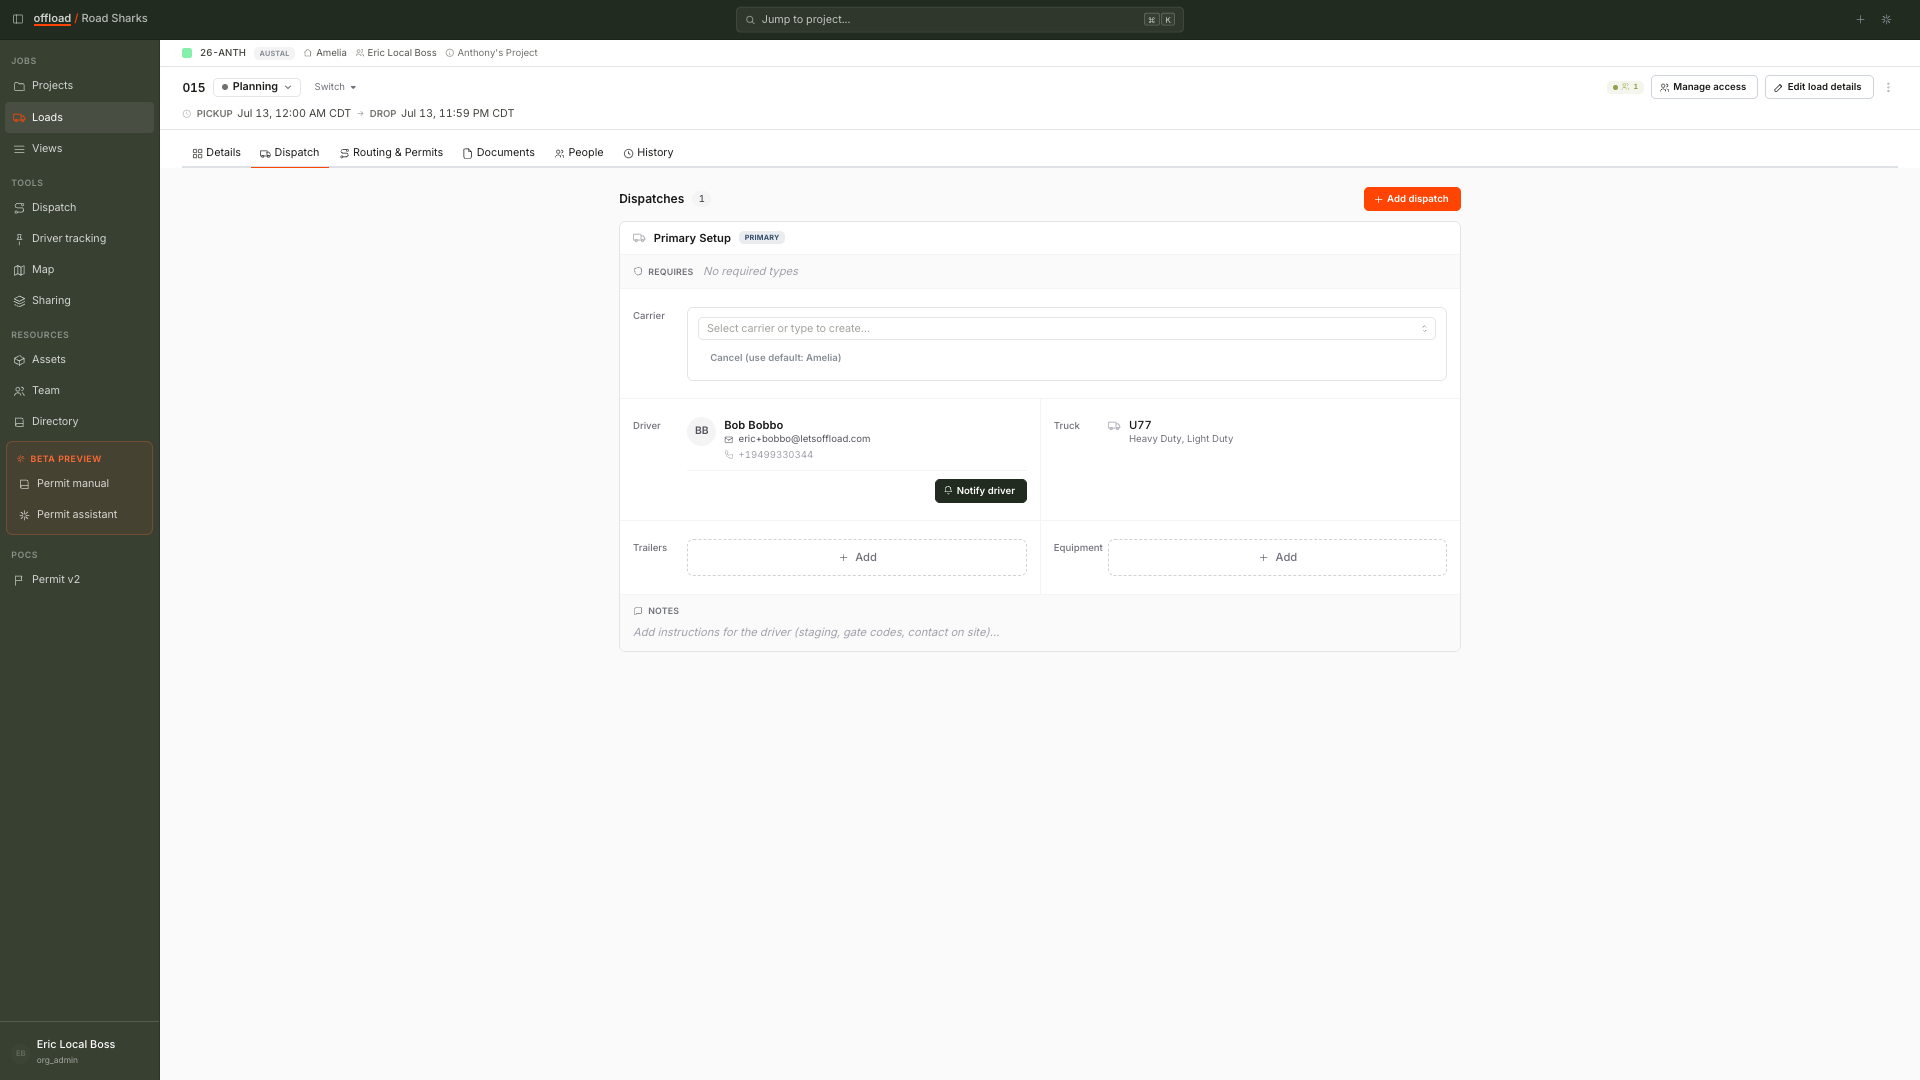
A load is moved by one or more equipment setups. Each setup is a rig: a driver, a truck, and the trailers or equipment it pulls. You build and assign setups on the load's Dispatch section, after the load is created (not in the Add Loads dialog).
Each setup can also record the outside company that provides that rig or service, like an escort or pilot-car service, a crane company, a rental vendor, or a sub-hauler:
- On the primary setup, the field is labeled Carrier. This is the load-level carrier. Until you set one, the setup shows your own company (or the project branch) as the inherited default.
- On additional setups, the field is labeled Company and is set per setup. You can assign a company, swap it, or remove it.
- Pick a company from your address book (Carrier, Vendor, Independent, or Customer types), or create a new one inline.
Organizing with projects
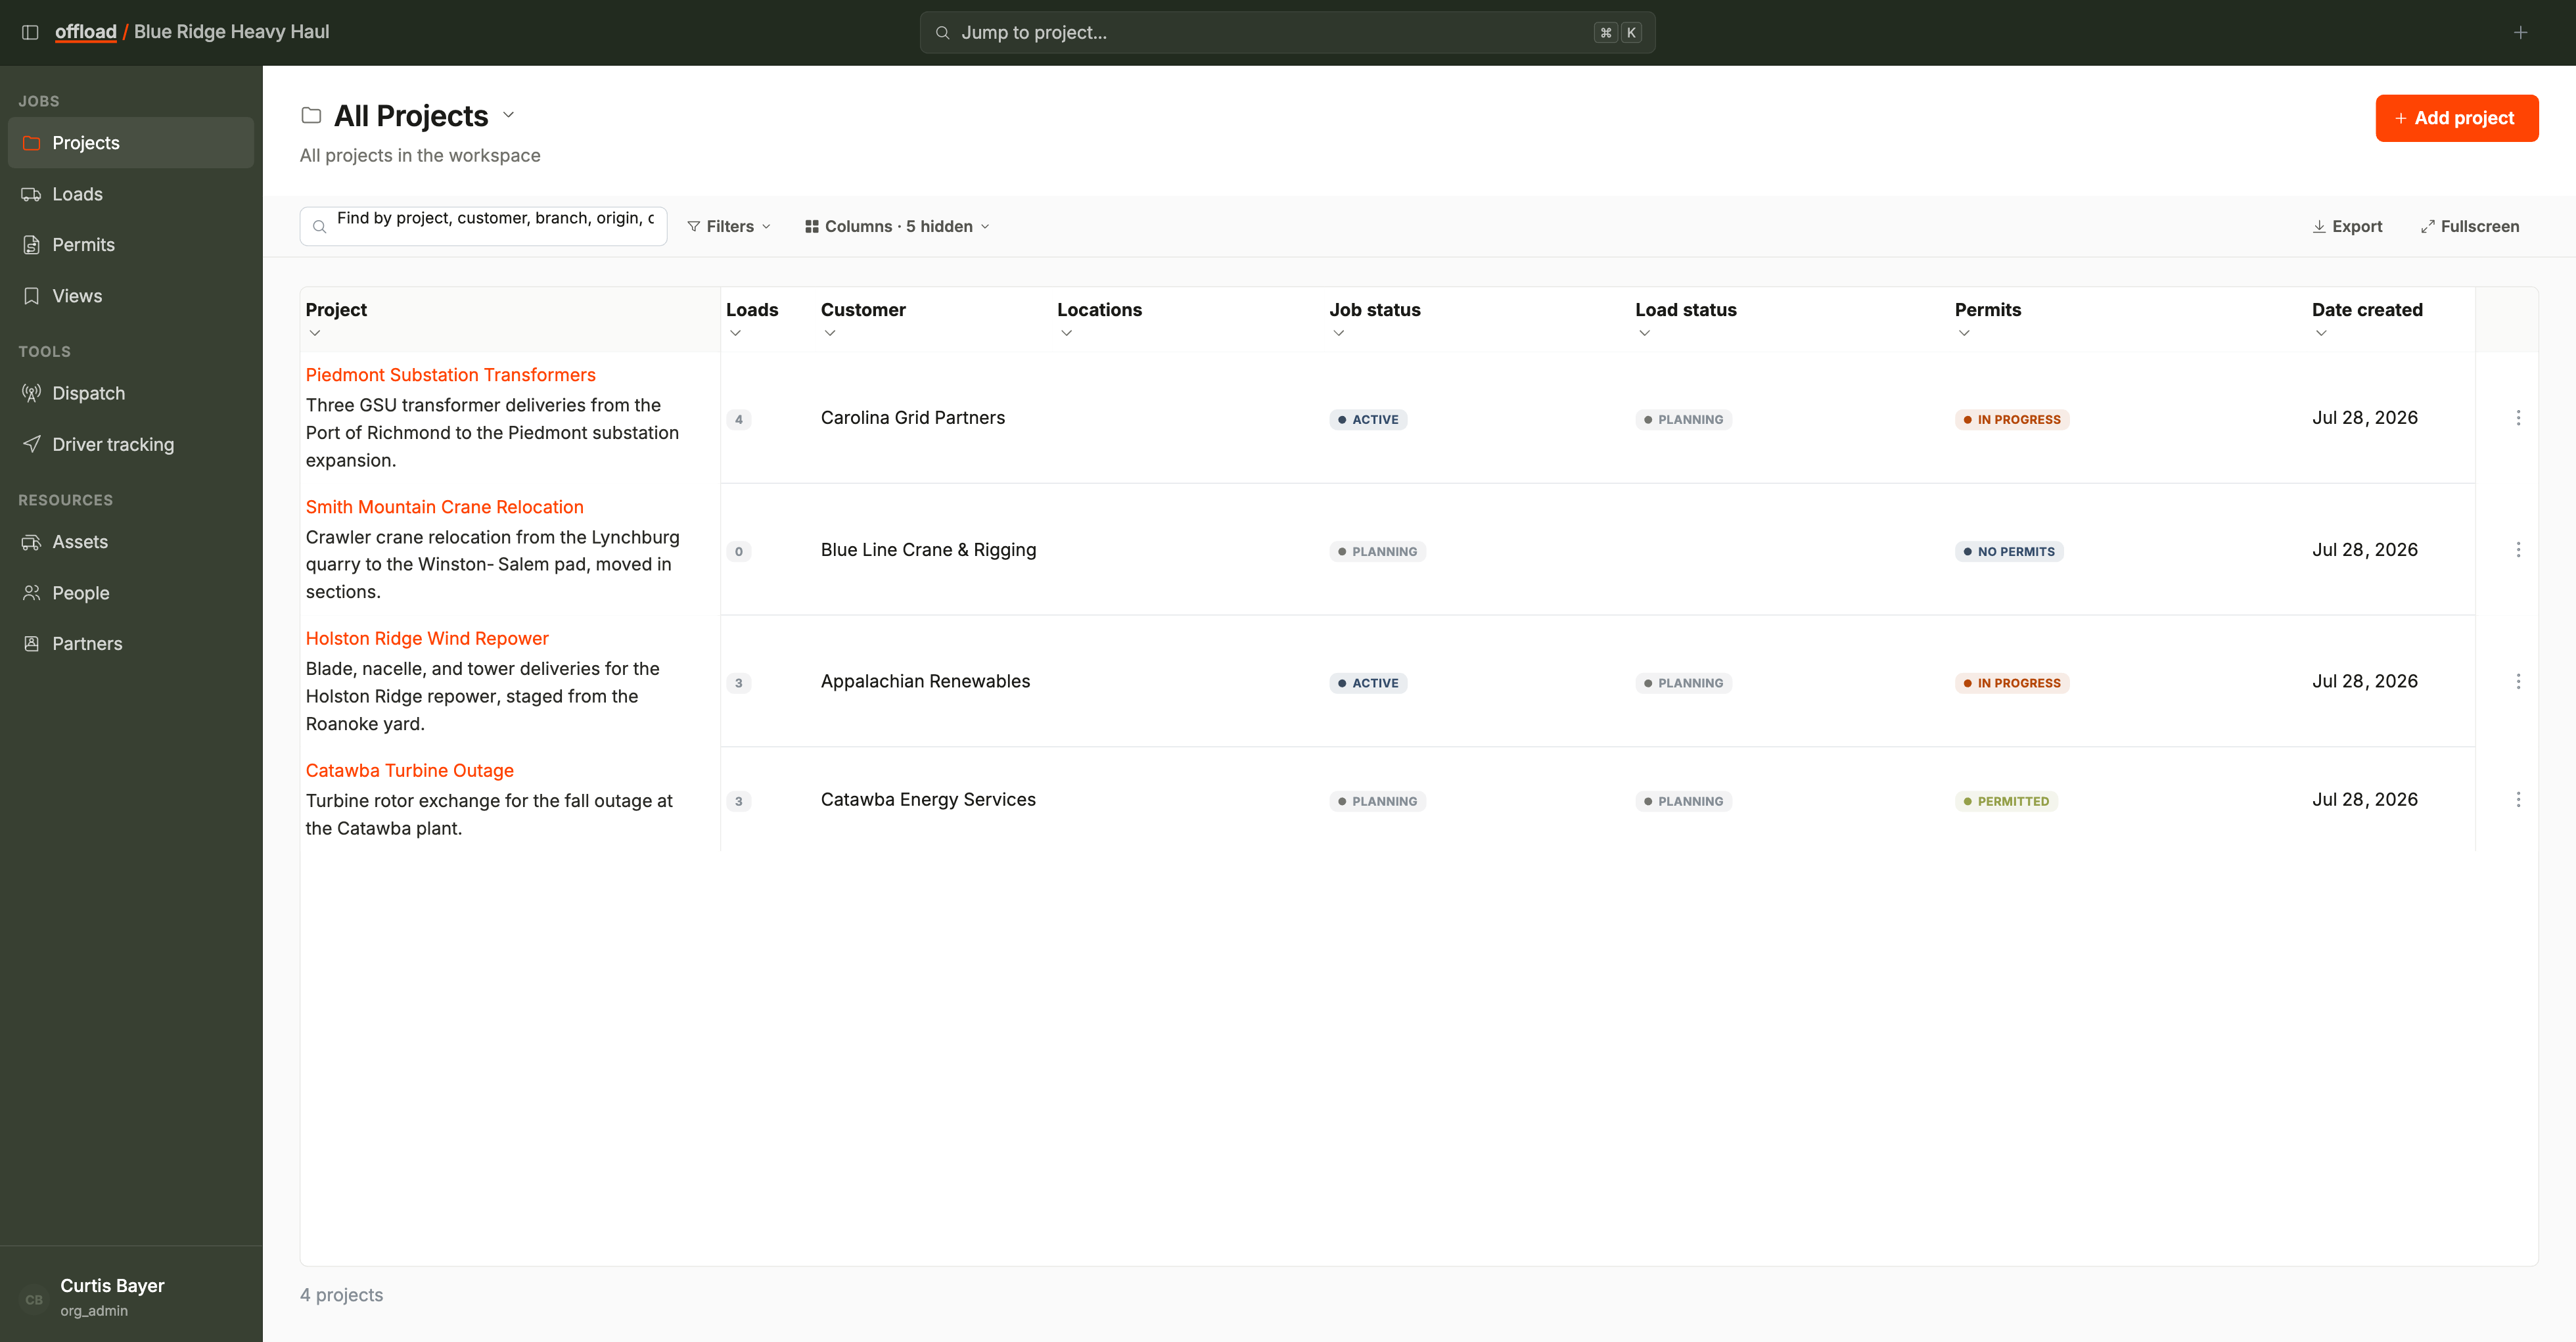
Every load belongs to a project (a job): the container that groups related loads, like all the loads for one job site or contract. A project carries the customer, branch, project manager, and job number. Its default job-site locations are quick picks when you set a load's locations, and its people and documents show up automatically on every load under it (tagged "Project", read-only on the load). For the full picture, including the Projects workspace, site work phases, and job numbering, see Projects.
Loads on the driver's phone
Drivers don't create their own loads. The dispatcher assigns them, and they show up on the driver's phone or tablet on their own, grouped by when they run. Each load opens to the permit, the route on a map, and a button to start navigation. See Finding your loads for the driver flow.
Viewing a shared load
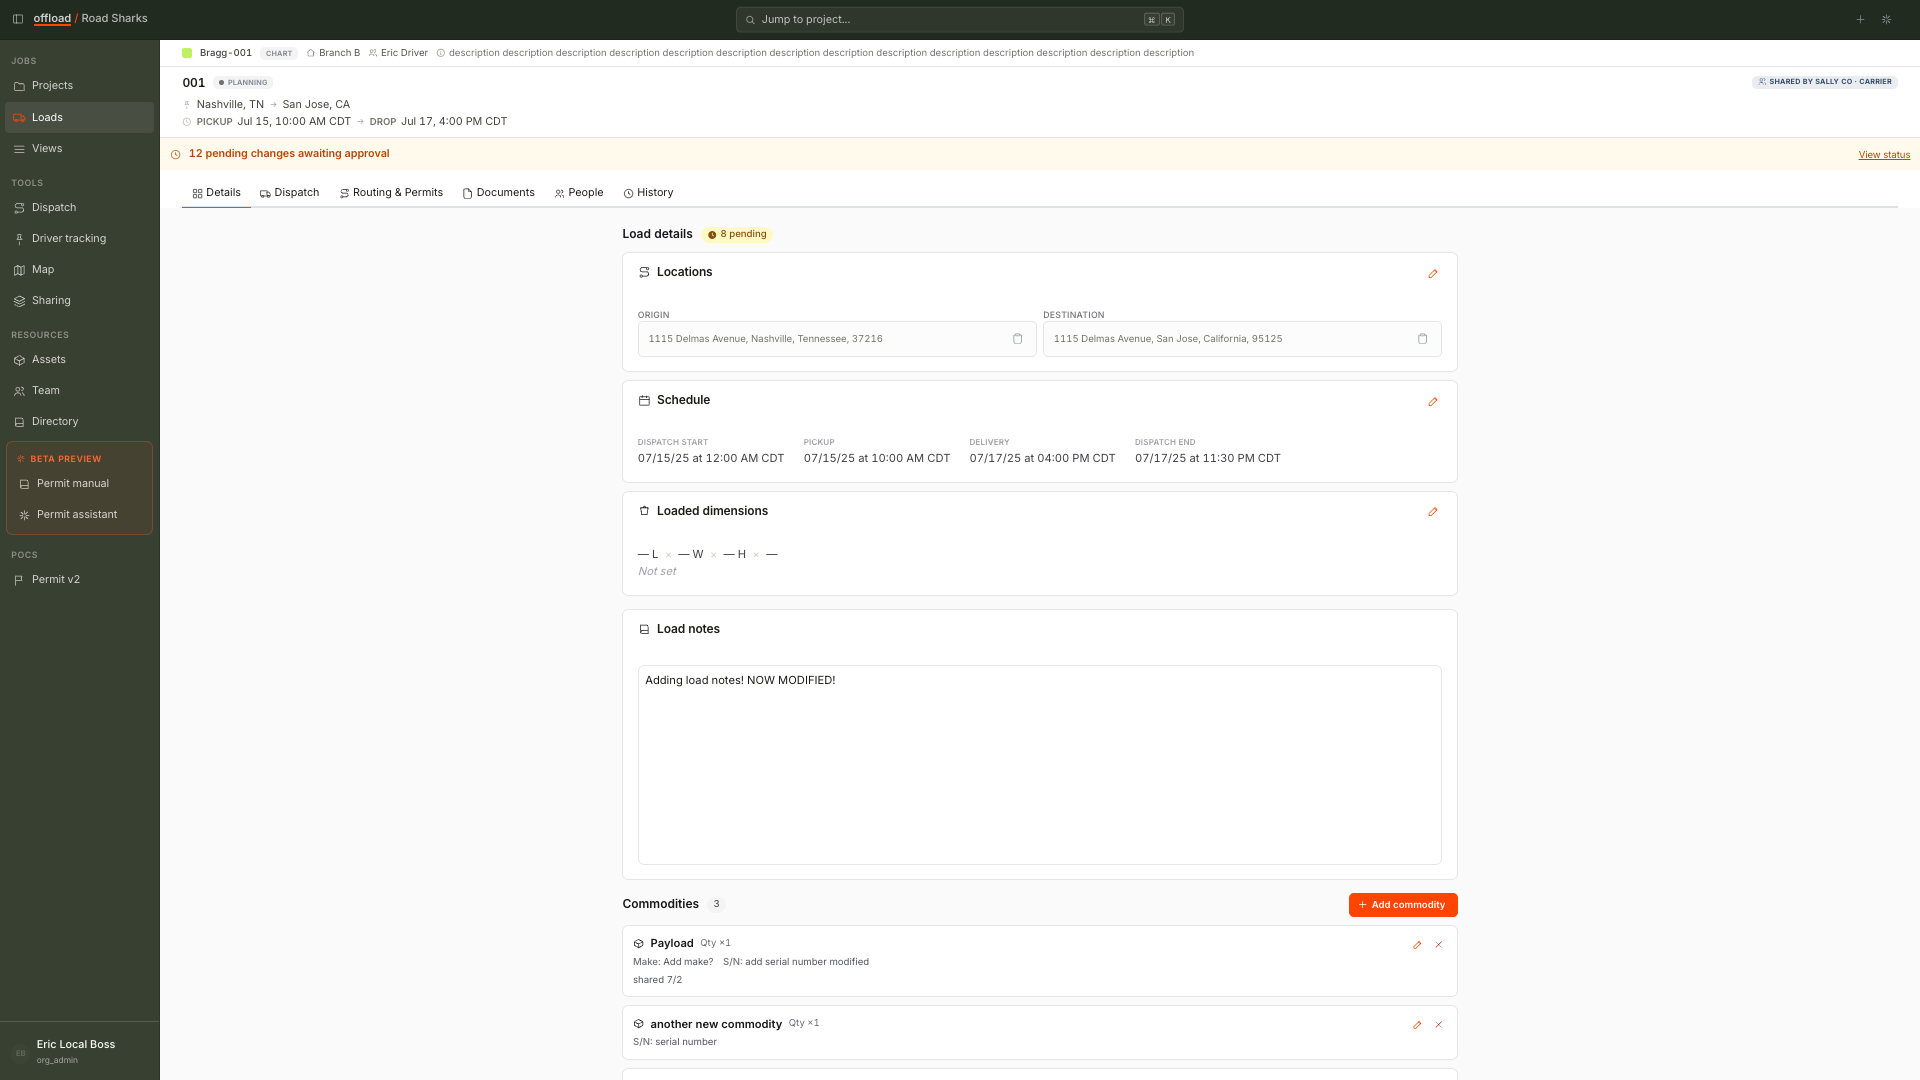
When another company shares a load with you, it opens to the same load detail page an owned load uses. A few things are tailored to you as the recipient:
- Project banner. If you filed the shared load into one of your own projects, the banner at the top shows your local project and links to it, so you can jump up to your project just like on an owned load. It shows the details you have: color, job number, customer, branch, project manager, and description. As the screen narrows, details drop off from the right rather than wrapping.
- Shared by indicator. A "Shared by" tag names the org that shared the load with you.
- Public share links. If you open a plain public share link (one you haven't filed into a project), the banner is a label with no navigation, since there's no project of yours to open.
- Privacy. You only see your own local project details on the banner. The source org's project details stay private to them.
For how sharing works and what each role can do, see Share roles.